To better meet real traffic conditions in Vietnam, HIQ VINA has upgraded its steel-core reflective road studs, delivering superior durability and higher warning effectiveness compared to the previous version.
Key Improvements
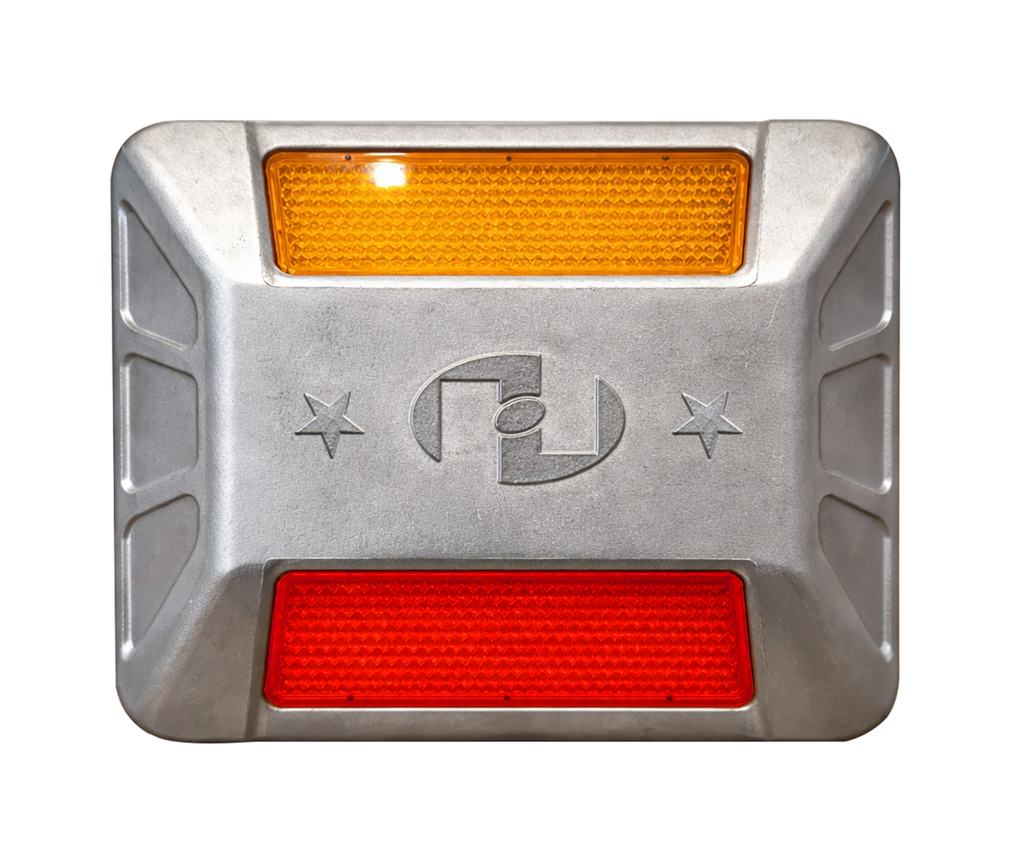
High-strength aluminum alloy material, capable of withstanding heavy loads and enhancing stability when vehicles pass over
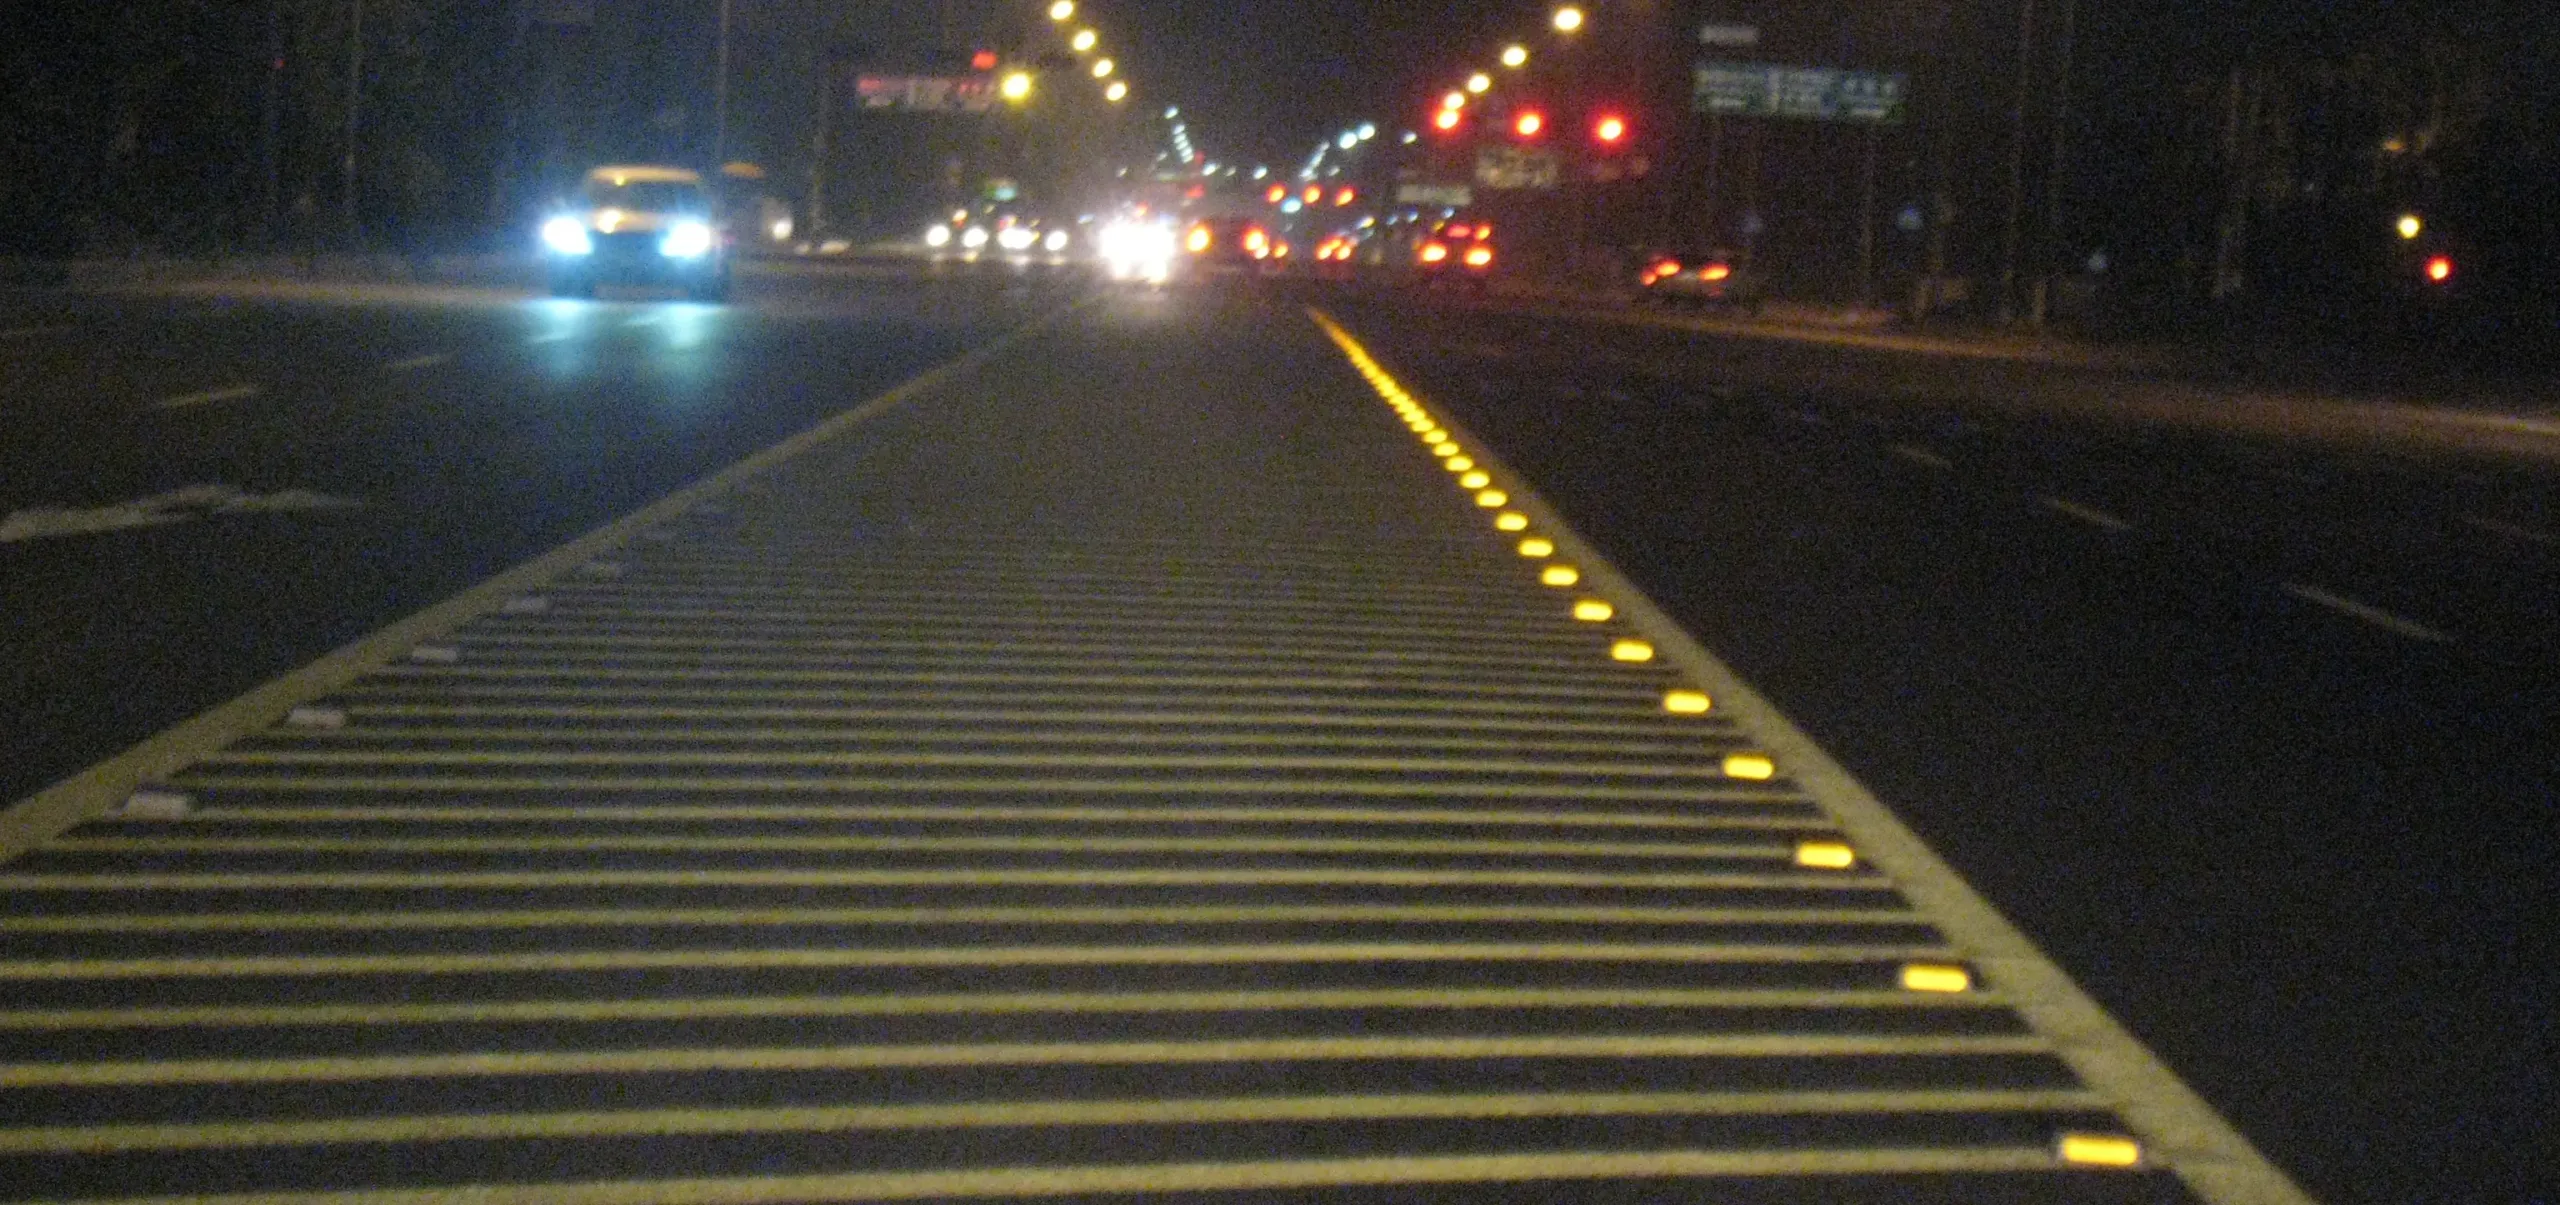
High-intensity reflectivity, ensuring clear visibility both day and night, in all weather conditions
Chamfered design <40°, rounded edges, and anti-slip grooves – safe for motorcycles and bicycles
Reinforced steel core inside, improving durability and suitability for various road surfaces in Vietnam
Practical Applications:
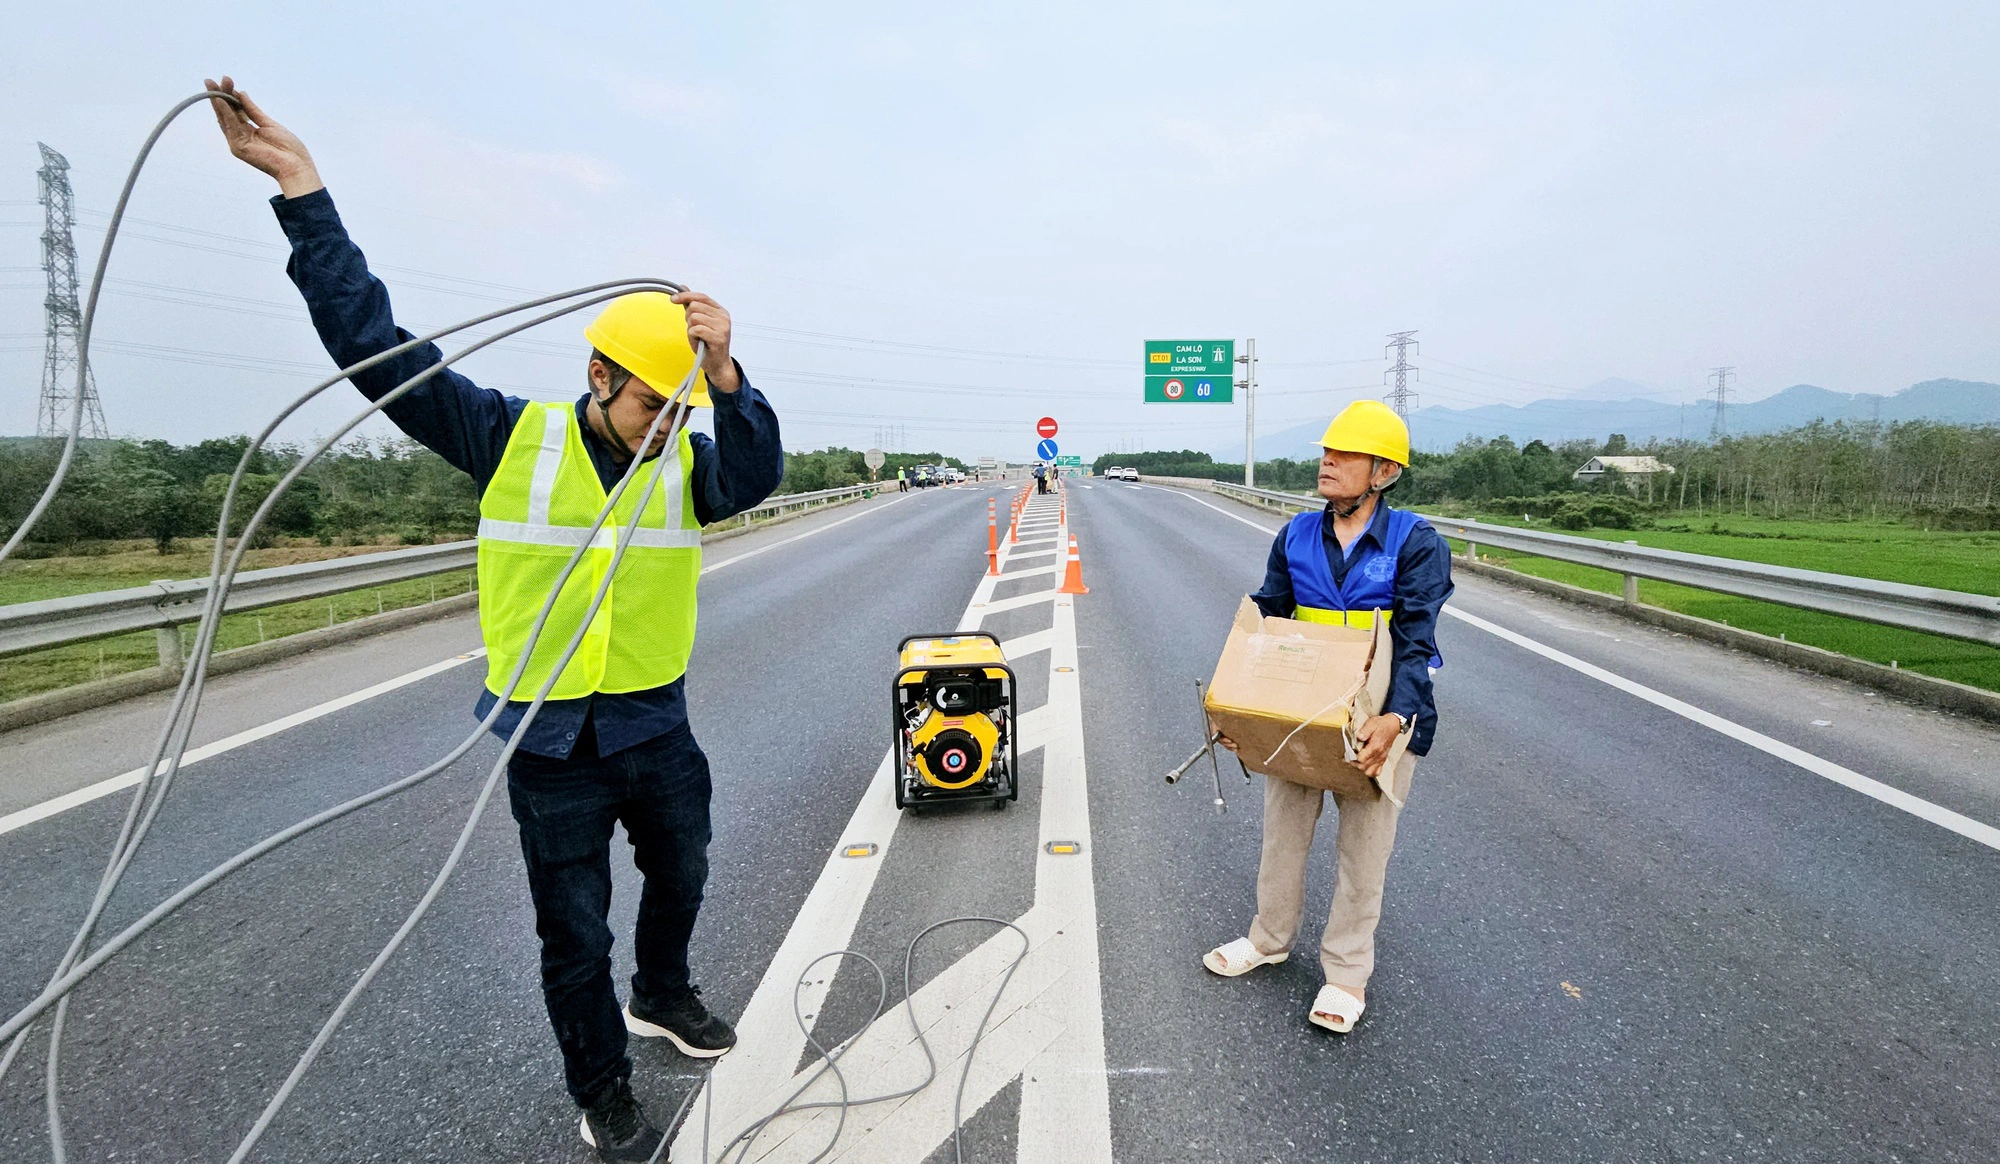
The product is installed on medians, lane dividers, traffic separation zones, and sidewalks, helping guide vehicles, improve visibility, and reduce accidents.
With its enhanced structure and materials, HIQ VINA’s steel-core reflective road studs continue to be an effective solution in modern traffic safety systems.
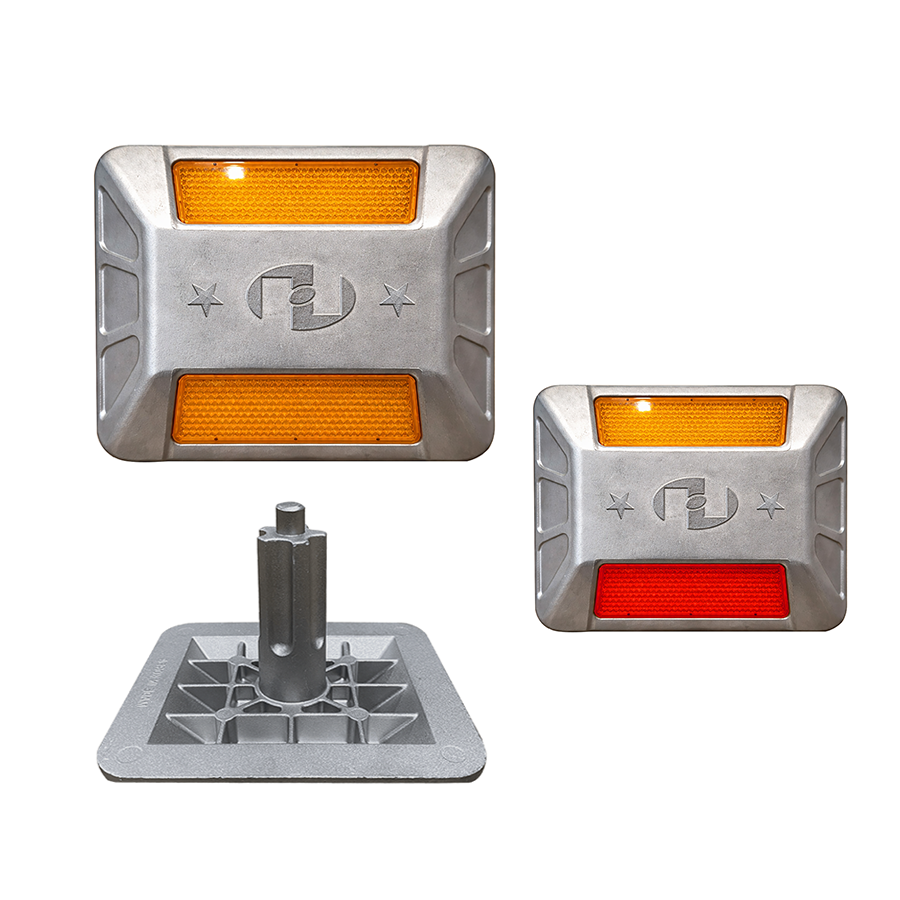
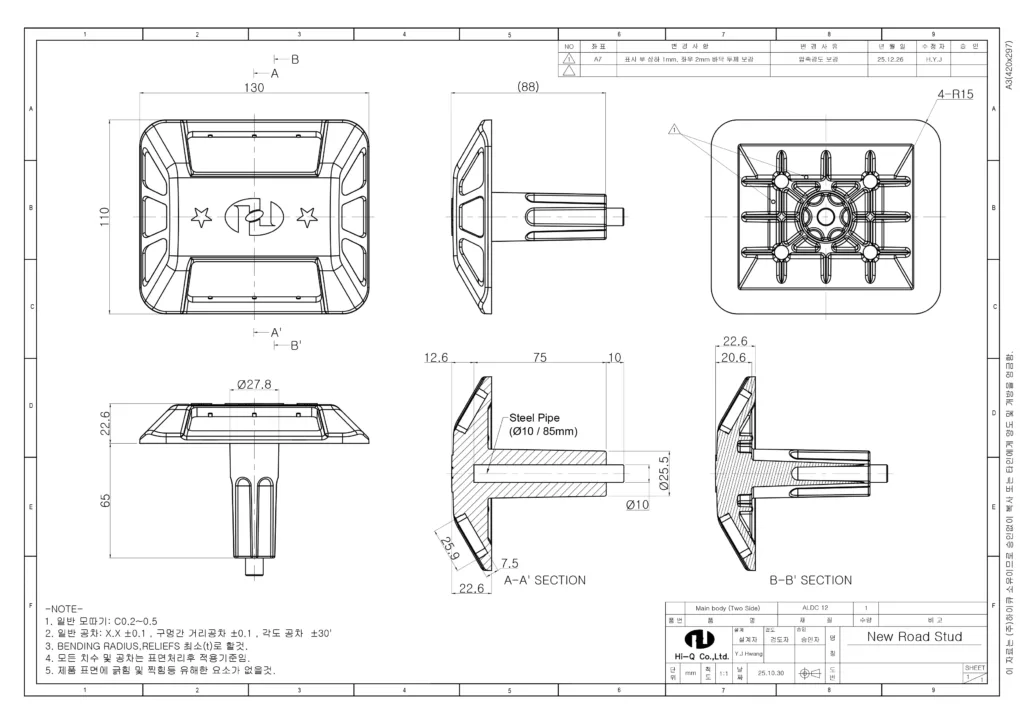
TECHNICAL DOCUMENT
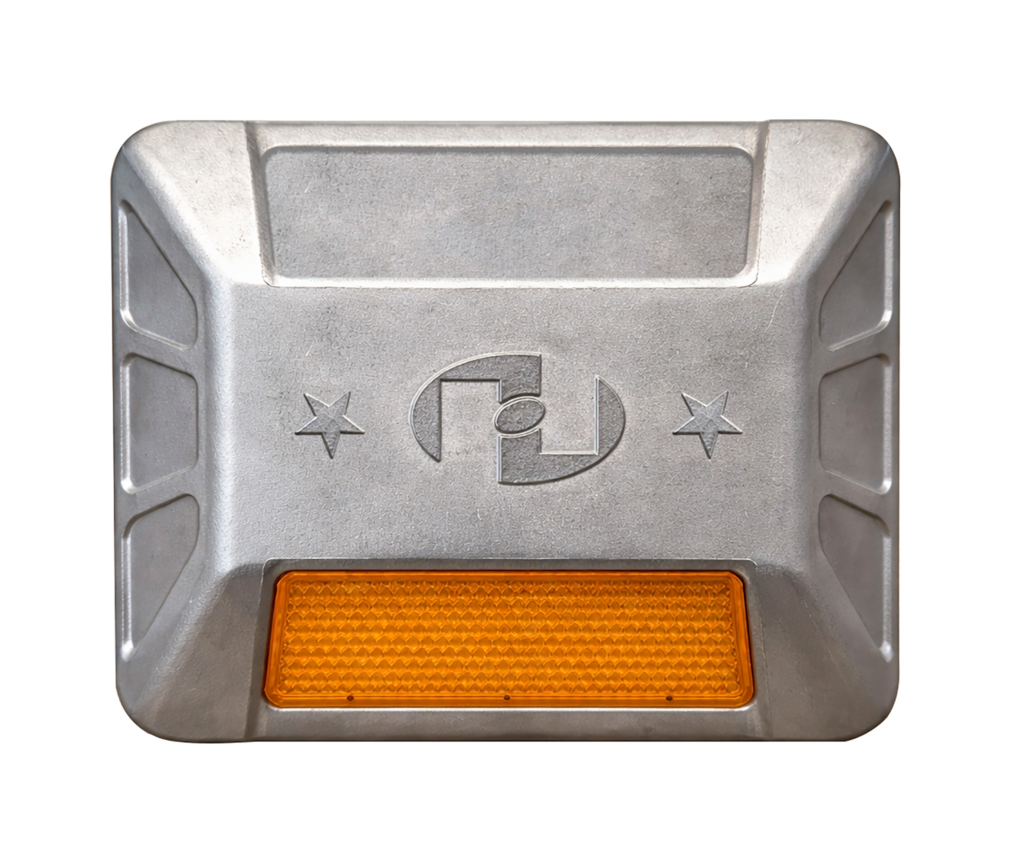
Single yellow face
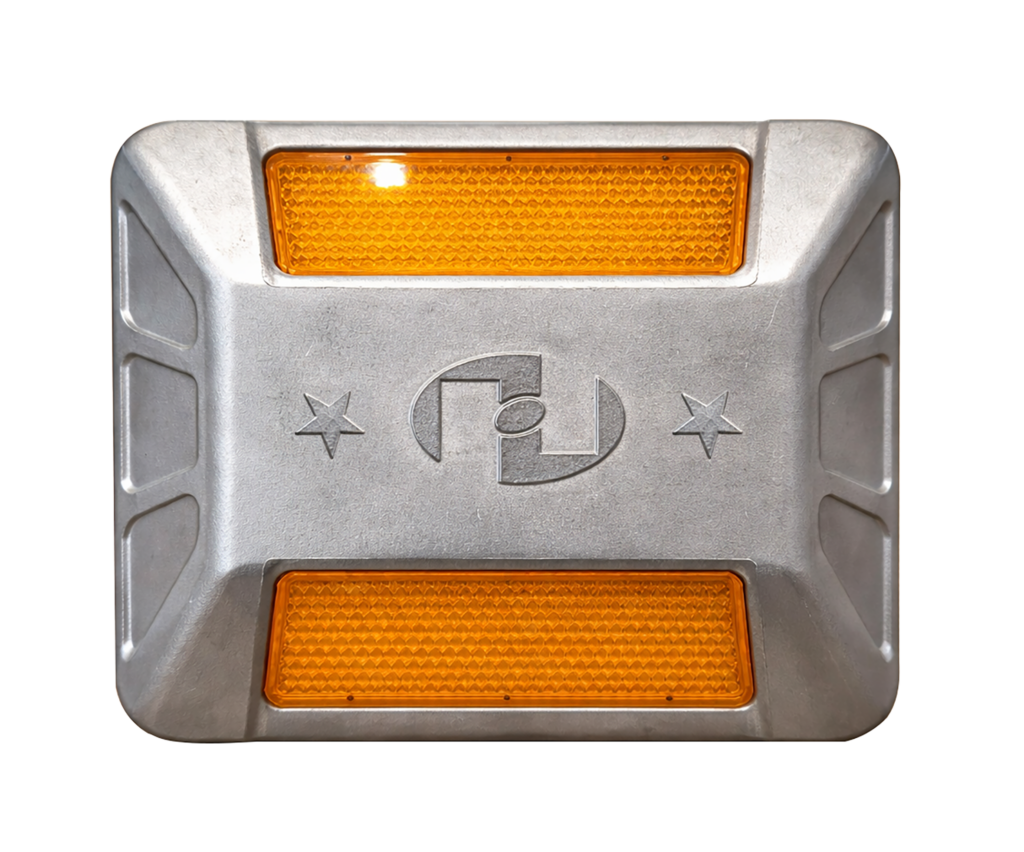
Double Yellow Face
One Yellow one red
INSTALLATION INSTRUCTIONS
Ideal Conditions
Surface moisture content below 6% under dry conditions, temperature from 10°C to 28°C, and humidity below 85%.
Required Tools for Installation
Drilling machine (hammer drill or standard drill), marking tools, air blower, rubber hammer or urethane hammer, epoxy adhesive, reflective road studs, safety warning equipment, and a specialized chisel for surface leveling.
Trình tự thi công
1. Safety Measures
To ensure safe installation, it is necessary to control traffic flow and set up guide signs and safety warning equipment.
2. Marking Drilling Positions
Check the installation locations and mark the drilling points on the road surface.
3. Drilling the Road Surface
Use a hammer drill or a standard drill with a diameter of 30–32 mm, drilling vertically to a depth of over 80 mm.
4. Surface Leveling
To ensure proper adhesion of the reflective road studs to the road surface, use a hammer or chisel to level the surface.
5. Checking the Installation Position
Insert the reflective road stud into the drilled hole, then move it up, down, left, and right to check for a 2–3 mm clearance and ensure proper contact with the road surface.
6. Removing Dust and Debris
Remove dust and foreign materials using an air blower.
7. Applying Epoxy Adhesive
Mix the epoxy adhesive with the base material and hardener, then fill 70%–80% of the drilled hole.
8. Installing the Reflective Road Stud
Slowly insert the stud into the drilled hole, then gently tap it with a urethane or rubber hammer to adjust it. Ensure the bottom of the reflective road stud is firmly bonded to the road surface.
9. Epoxy Drying Time
During the curing time of the epoxy, traffic must still be controlled. (Since the curing time may vary depending on the manufacturer and usage conditions, it is necessary to refer to the adhesive manufacturer’s instructions.)
10. Inspection After Installation
Check whether the spacing between the reflective road studs and the road surface, as well as the curing and adhesion, meet the required specifications. Then clean the surrounding installation area and remove all previously installed safety warning equipment from the site.
Document
Click to download the PDF design file (.PDF file extension).


